 简体中文
简体中文 Русский
 Español
How to install flanged butterfly valv
Posted by Bundor valve
Q: How does the flanged butterfly valve install to the pipeline?
Bundor valve: There are two common connection methods for butterfly valves. One is the wafer butterfly valve. Wafer butterfly valve does not have a flange. When installing with the pipeline, another two flanges are required to clamp the wafer butterfly valve. The other is the flanged butterfly valve that we will talk about in this article.
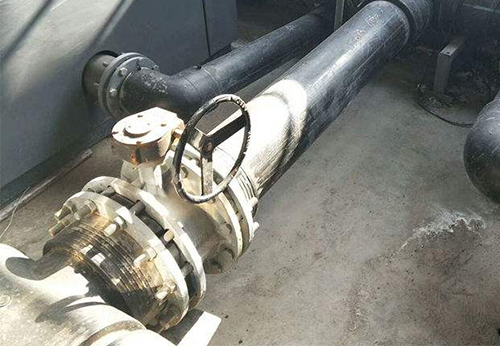
The flanged butterfly valve body comes with two flanges. When installing to the pipeline, it is only necessary to make sure the the flange hole on the flanged butterfly valve and the flange hole on the pipeline in same line, then fix it with bolts.
There are several points to pay attention to when installing the flanged butterfly valve to the pipeline:
1. During installation, the end face between the flange of the butterfly valve body and the upper flange of the pipeline should be parallel, and there should be no skew, otherwise the flange connection may leak due to insufficient tightening of the bolts.
2. When the flanged butterfly valve is installed on the pipeline, gaskets should be added in both side, but double gaskets cannot be used.
3. When tightening the bolts, it should be done symmetrically, and the tightening force of each bolt of the flange connection at both ends should be uniform and consistent.
4. When installing, first install the bolts of the positioning holes on the butterfly valve, and fix the position of the butterfly valve in the center. In addition, when tightening the flange bolts, tighten them symmetrically and alternately, and do not tighten the bolts individually in sequence.
Bundor valve: There are two common connection methods for butterfly valves. One is the wafer butterfly valve. Wafer butterfly valve does not have a flange. When installing with the pipeline, another two flanges are required to clamp the wafer butterfly valve. The other is the flanged butterfly valve that we will talk about in this article.
The flanged butterfly valve body comes with two flanges. When installing to the pipeline, it is only necessary to make sure the the flange hole on the flanged butterfly valve and the flange hole on the pipeline in same line, then fix it with bolts.
There are several points to pay attention to when installing the flanged butterfly valve to the pipeline:
1. During installation, the end face between the flange of the butterfly valve body and the upper flange of the pipeline should be parallel, and there should be no skew, otherwise the flange connection may leak due to insufficient tightening of the bolts.
2. When the flanged butterfly valve is installed on the pipeline, gaskets should be added in both side, but double gaskets cannot be used.
3. When tightening the bolts, it should be done symmetrically, and the tightening force of each bolt of the flange connection at both ends should be uniform and consistent.
4. When installing, first install the bolts of the positioning holes on the butterfly valve, and fix the position of the butterfly valve in the center. In addition, when tightening the flange bolts, tighten them symmetrically and alternately, and do not tighten the bolts individually in sequence.